16 April 2013

No Guilt Vegan Lasagna

I love Italian food. Actually, I have a fondness for ethnic foods in general, but Italian dishes in the past have always been my go-to comfort foods. Since adopting a vegan diet, and focusing on raw foods where possible, the pasta and cheese that I used to find such comfort in are a thing of the past. I have gone through a sort of grieving process. I am very fond of cheese and pasta... at times I really miss them, along with chocolate, coffee, sugar and a list too long to detail... I chose to eat a vegan diet because I wanted to win my battle with Fibromyalgia and get my life back. Unlike many people who follow a vegan diet, I have no problem using foods derived from animals, such as milk, eggs, cheese, and honey. These were mainstays in my vegetarian diet, but no matter how healthy I tried to eat, I wasn't making any headway with the debilitating manifestations of FM, so I decided to give vegan/raw a try. Having made such wonderful progress in my health, tempted as I may be to cheat and have some comforting, deeply satisfying, rich, cheesy lasagne, I will forgo the pleasure and stick with the vegan diet. Sigh...

It has been on my to-do list for some time to come up with a recipe for a comforting, rich, flavorful lasagna that would be healthful, relatively light on caloric intake, and fully raw. This past week I finally set aside the time to play in the kitchen and came up with what I consider a success. Of course it isn't lasagna in the classic sense of the word, since it isn't served hot and there is nary a whiff of dairy cheese anywhere, but it is quite good. It would make a great festive dinner for the summer, when it is too hot to heat up the kitchen, whether you're vegan or not.

**Before I get into the recipe, I want to talk about some things I do to make my life easier day to day. In order to be equipped for preparing interesting and varied meals, I have found it necessary to do certain things ahead and in bulk in preparation for daily meal preps. I have a routine. I make and keep on hand several kinds of lacto-fermented foods, like sauerkraut and kimchee, for adding to salads and using as a flavorful side dish or snack, I pickle daikon and other veggies, sprout a number of different kinds of seeds for use in salads and wraps, I soak and sprout some seeds to boost nutrition but "harvest" them when just the tips of the sprout pokes out, before any leaves develop. I soak and  freeze or dehydrate all the nuts that we eat, to eliminate the naturally occurring enzymes that prevent premature sprouting, but are also digestive inhibitors. I make kombucha, and for my husband who does eat some dairy and loves baked bread, I make kefir and enjoy keeping a sour dough starter for making bread. I also keep a supply of sundried tomatoes in the fridge, soaked and ready to use. I keep these things going perpetually. Something is always growing, culturing, or fermenting on my counter. If you are trying to eat more living food, I would suggest that you get in the habit of preparing as many staple items as possible ahead of when you will need them. That way daily meal prep times are greatly reduced.**

The Lasagna Ingredients List

For  Cashew Cheese
Two heaping cups of raw cashews, soaked for 4 hours in water, then drained,(this will make about 3 cups soaked cashews)
Two large or 3 medium cloves of garlic, crushed and roughly chopped
A large handful of fresh basil, (about 3/4 cup)
One tsp. sea salt or real salt
 Braggs Apple Cider Vinegar, 1/4 cup
Scant 1/3 cup water
One Tablespoon extra virgin olive oil

For the Filling
Two carrots grated
One large zucchini
2 cups spinach or chard, shredded
One package enoki mushrooms or one cup cremini mushrooms sliced thinly

For the Sauce
Two cups of sun dried tomatoes, soaked for 4 hours in water, reserve 1/3 cup soaking water.
Two Roma tomatoes, quartered
Sprig Fresh rosemary, Two -three sprigs each parsley and oregano, and a handful of basil  , (approx. one cup).
Two- three garlic cloves, crushed and roughly chopped
Two tablespoons extra virgin olive oil
A tablespoon or two of tomatos powder, (optional)
Red wine, 1/4 cup, or one tablspoon balsamic or red wine vinegar
One tsp. agave
One tsp. salt

Equipment Needed
Large sharp knife
High powered blender, (not a personal bullet blender)
Mandoline, or V-slicer, (if available)
Garlic press, (if desired)


 The Cheese
The first step to making the vegan lasagna is to soak a large bag of raw cashews for at least four hours, (I get mine from an Indian market in Charlotte, their prices are very affordable. If you don't have a ethnic market that sells raw cashews, look for them at the natural food store). The cashews should soak long enough to remove all the digestive inhibitor and to make them soft so that they will be creamy when blended. The cashews should be raw, roasted cashews will not work for making cashew cheese for the lasagna. Drain the cashews and let sit in strainer for awhile to drip dry. Take out 3 cups of cashews for the recipe and place the remaining cashews in a freezer bag for use in the future. Be sure to mark the bag as soaked cashews and store in the freezer.

In a high powered blender, place the three cups of soaked cashews in the blender with 2 large or 3 medium peeled and chopped or pressed garlic, 1 tsp. sea salt or Real salt, a big handful of fresh basil, and 1/4 cup Bragg's apple cider vinegar and 1 tsp. agave. Pulse to begin chopping the nuts, then add water a little at a time to keep the blades taking the nuts down. Do not add much water at first, pulse and scrape the cashew mixture frequently, start with a scant 1/4 cup of water and a drizzle of extra virgin olive oil. Add water carefully and sparingly, just enough water to keep things moving in the blender. Once the nuts are moving around the blender and it is beginning to get creamy, stop adding water and just pulse and scrape to keep things moving. Each time will be different dependent upon weather and how much water the cashews took up while soaking, but I used less that 1/3 cup of water when I made it. The objective is to have a very thick "cheese" the consistency of drained ricotta cheese. Taste and adjust salt as desired and chill while preparing the veggies for assembly.

The Veggies
For the filling in the layers of the lasagna, grate two carrots, shred into strips several handfuls of spinach or swiss chard. I used swiss chard, folded several leaves together lengthwise and cut across the width in small strips. Since I was using Bright Lights Swiss Chard, that has a rainbow of colors, this made each strip green on either side with a pretty splash of color in the middle. Thinly slice a small package (4 oz. is plenty) of cremini mushrooms, or if you can find them use enoki mushrooms as I did. I found a variety of fresh mushrooms at an oriental market for a very affordable price. The enoki mushrooms are quite nice in this lasagna, but if you can't find them cremini will be fine, just slice them thinly.
Choose a large zucchini. This is a great use for those blimp sized zukes that went unnoticed for a few days in the garden. As long as the flesh is still tender and the seeds are small, a zucchini 10-14" long is perfect. With a sharp knife, cut the ends off , cut in half across the width, then stand on one cut end and cut a strip off to make a flat surface, so it will make good contact with the slicer. With a mandoline or V slicer, slice medium thick lengthwise slices of a zucchini. If you don't have a slicer then stand on end and make 1/8th slices with a large sharp knife. These strips will be about 1/8" thick or slightly thicker, but not as thick a 1/4 inch. They will be used in the place of pasta in the raw lasagna.


The Sauce

 Here is another time that I make in advance what I will need over the course of a week. This recipe calls for 2 cups soaked sun dried or dehydrated tomatoes, so I put a whole bag 8 oz. of them in a mason jar to soak with some garlic granules and a sprig or so of fresh rosemary. They will keep in the fridge for several weeks so what doesn't get used in this recipe will be available for use for other purposes later. Soak the tomatoes for when you soak the cashews, so that they will both be ready when you want to prepare the lasagna. Reserve 1/3 cup of soaking liquid. Cut the ends off two-three ripe Roma tomatoes, quarter and place in a high powered blender with the soaked sun dried tomatoes, a handful of fresh basil, a few sprigs of fresh oregano, parsley and rosemary, (strip the rosemary off the woody stem before putting in the blender), and 2-3 large cloves of garlic crushed and rough chopped. We are crazy for garlic so we use a lot; if you aren't as enthusiastic about garlic as we are use less. Because I have it on hand, and I really like the bright tomato-y flavor I use a tablespoon or so of tomato powder at the end of the blending process, to thicken up the sauce. This isn't readily available in stores so it isn't integral to the recipe, but does add a nice flavor if you happen to have some. I get my tomato powder from Honeyville Grains. The tomato powder is part of my emergency pantry and long term storage food supplies. To the tomatoes, herbs and garlic add 2 tablespoons of extra virgin olive oil and 1/4 cup of red wine, (optional, but if you don't use the wine add a tblsp. of balsamic vinegar or red wine vinegar),  a tsp. of agave and a tsp. of salt.

 Blend these together, pulsing and scraping to get the mixture into the blades until things are chopped up well. Then while blender is running, add some of the reserved tomato soaking water, small quantities at a time, so that the whole business ends up a little looser than the consistency of tomato paste. Only use as much as necessary to get the blender blades to pull the tomatoes mixture through and create a nice thick paste. If available, at this point add your tomato powder and blend to distribute.
The tomato sauce should be very close to the consistency of tomato paste.

The Assembly
The assemble is done on individual plates.  Start by placing two strip of zucchini on the plate.  Spread a modest layer of the cashew cheese on the zucchini then spread with the tomato sauce. Next sprinkle with shredded carrots.

Place the enoki mushrooms, (or cremini mushrooms if that is what you are using), then arrange your shredded greens atop the mushrooms and cover with a second layer of zucchini. Repeat, as for the first layer, cheese, sauce veggies and top with a final layer of zucchini.


Top the final strips of zucchini with sauce and sprinkle with  a nice dusting nutritional yeast. Decorate the top with a few sprigs of enoki mushroom and a small piece of curly kale or parsley. Serve at room temperature with  a crusty bread, and a salad.


I hope that you will give this a try, I know it is a little different, but then sometimes doing something a little different is a good thing! Take care and I will see you again soon!

Blog Hops this post is linked to:
Tackle the Menu Tuesday 
Frugal Days, Sustainable Ways #68 
Busy Bee's 13th Blog Hop
Adorned From Above Blog Hop #16
Farm Girl Fest #29
Farm Girl Friday #105


11 April 2013

A Day At Heart's Ease Cottage

Well, the weather is warming up and it is time to spend our days outside. I thought I would do a pictorial "Day in the Life" at Heart's Ease Cottage. Just for fun!

We started our morning by making our three day supply of vegetable juice, we buy organic carrots and a few other veggies, but all the greens come from our garden.

After juicing the next job was to clear the bolting lettuce from one of the beds and replant with the starts that just came out from under the lights inside.

Bibb lettuce seedlings go in where the mixed leaf lettuce came out. The romaine in the front of the bed is still tasty so we will try and get it used up before it decides to go bitter and bolt.

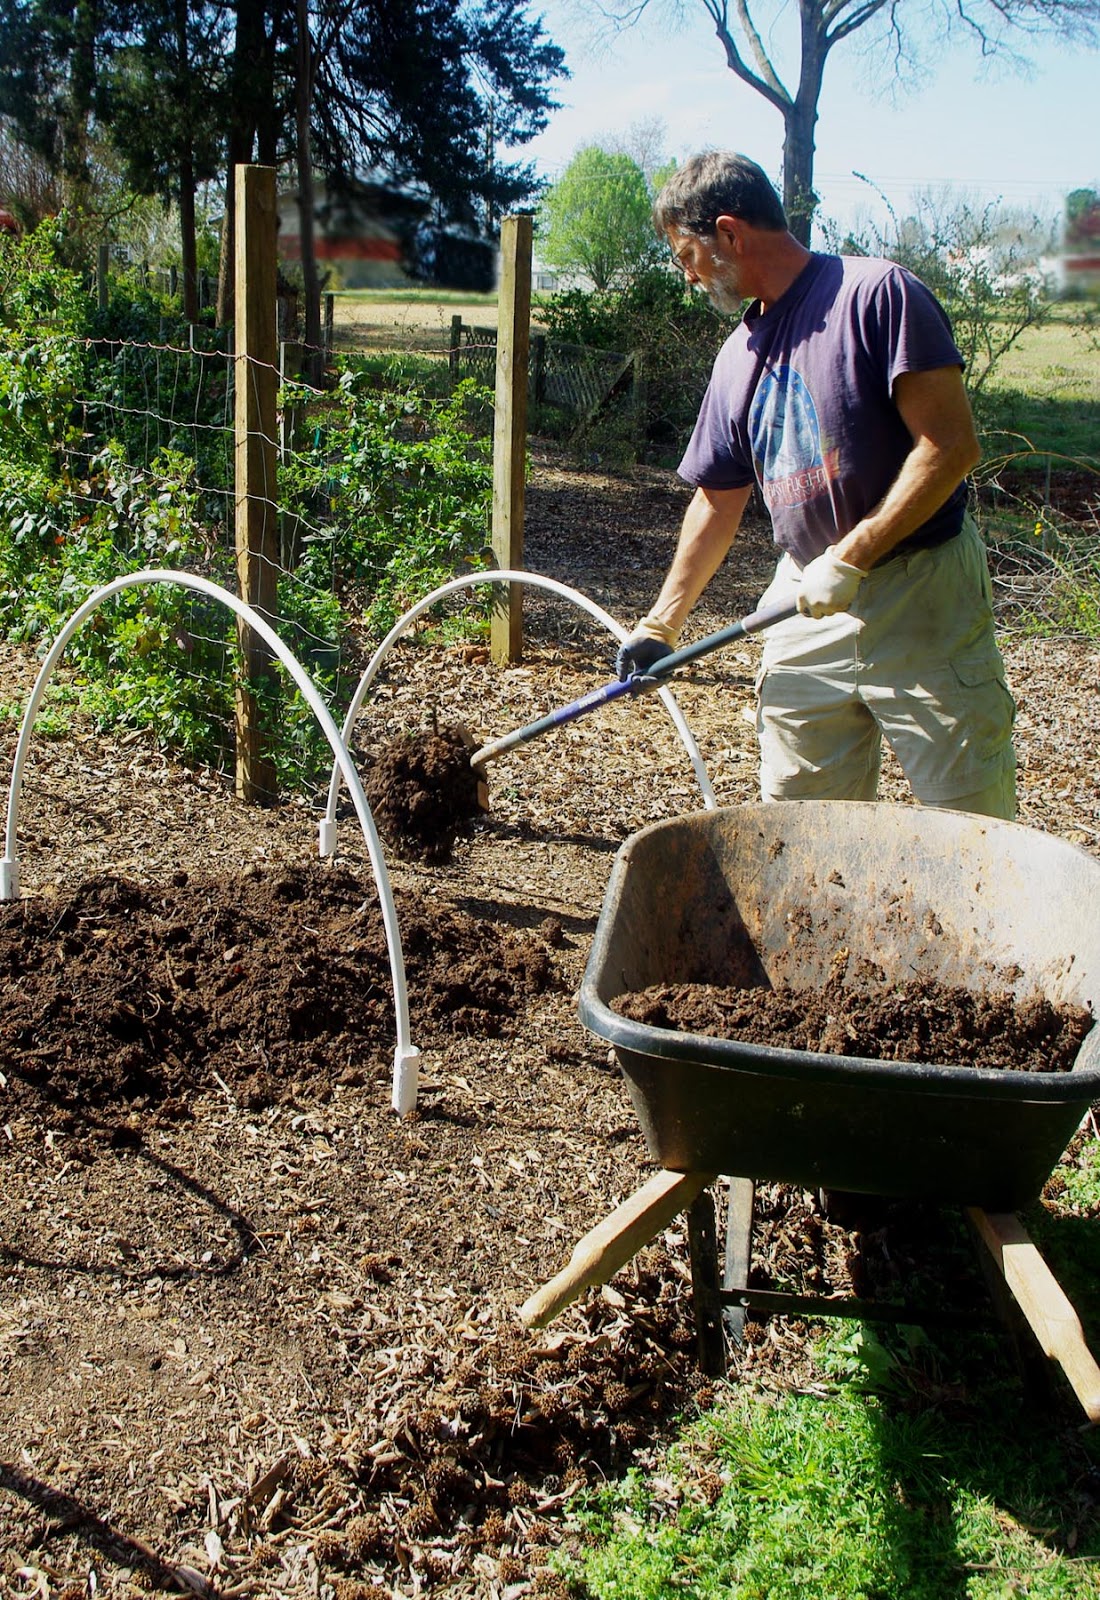
My husband took the plastic off the green house tunnels, cleaned them and spread them out to dry so they can be stored until cold weather requires them again.

Da is top dressing the beds with compost before I plant the next round of veggies.

The compost is very friable and full of earthworms.

While Da is top dressing, I am clearing the cabbages from the bed and preparing them to go inside to become sauerkraut, dehydrated cabbage and stir fry for dinner.

Cabbage heads and trimmings. The cabbage heads go to the house, trimmings go to the compost pile.

After the most of the cabbages are cleared from the bed I rake it clear of debris. Da will top dress once it is cleaned up and I will replant with the next crop of late spring cabbages.

My next task is to prepare the cabbages to become sauerkraut and dehydrated cabbage.

We will use the dehydrated cabbage in soups and casseroles. We eat mostly raw, but on occasion I like to have something cooked. The rest is stored for long term storage emergency pantry use.

By 2 o'clock the  green drink and mountain of fresh fruit we had for brekkers have disappeared and tummies are grumbling. It is time for me to make lunch! I will start with a base of fresh picked and washed mixed lettuces, chard and spinach from the garden.

To the bed of greens I will add grated organic carrots, bell pepper, red onion, broccoli, home made raw sauerkraut (see tutorial), home made raw daikon radish and carrot pickles (see tutorial), and top it with a few soaked raw cashews. There is no need for a salad dressing since the kraut and the pickled veggies add both a burst of flavor and a little moisture.

I topped the salad with a sprinkling of dulse flakes for extra vitamins and iodine and add a side dish of fresh mango, pineapple and kiwi. A healthy, tasty and beautiful lunch that is a feast for the eyes as well as the body!

 The rest of the afternoon was spent preparing dinner and working on this blog entry... I am beat. We got a bunch of things done, spent time in each others company and even got a start on a bit of a tan, it has been a lovely day!

Blog Hops this post is linked to:
Clever Chicks Blog hop #30


A Long Time In Coming... Part 2

In the intervening years since the chimney fire, (read part one of the story here), our little cottage has seen many changes and improvements. The initial construction was done when we were novice builders and there were some things we decided to do over, due to mistakes made by inexperience. We also had to use salvage goods for building materials, since there were limited supplies for a good while after the hurricane, so we replaced our salvage yard doors and floor coverings as time and money allowed.

The total time elapsed on completion of the house after the hurricane was about 6 years. During those years we lived our lives around the construction projects going on inside. We split our time between indoor construction projects, and establishing gardens and outbuildings to house our growing menagerie of barnyard animals.
A roof top view of one of our early garden configurations. The espaliered fruit trees and our two "sentinal" plum trees were just a few years old. The potting shed was later torn down to make more room for blueberry bushes.

The kids helped to finish their rooms, doing whatever task was appropriate to their age. Driving nails, spackling sheet rock, sanding and painting, were some of the things that they did. Our oldest son, who was 9 or 10 at the time, wanted to place a time capsule in the space above his door frame, so in the future if the walls ever came down again, there would be a history of the boy whose room it was. Before we closed the walls in with sheet rock, he placed his time capsule in the wall and signed the wooden header above the door with his signature and the date. The youngest also "signed" his wall frame before the sheet rock went up, although his signature was that of a 3 year old so it wasn't really legible. I think the experience of living as we had to live for those years, gave my children exposure to a number of useful skills and experiences that added significantly to their lives as adults.

Our house has been a work in process for 24 years, we have raised our children, home schooled two very different children, supporting their interests by allowing them to develop parts of the yard for their own use. N. our oldest, was very interested in creating bonsai. He had several beautiful specimens that he created and more that he collected from other places. He selected the east side of the house to have a showcase garden for his bonsai. He and his dad designed and built display tables for his bonsai and collection of Ping Mountain rocks that he used as foils for his trees. It was a lovely addition to the yard and gave us much pleasure.
Our oldest son with a couple of his bonsai trees. Circa 1996
N. training his root over rock Ficus Benjamina


 Our youngest child, E.M., was interested in animals and wanted to raise chickens. He and his dad built his first chicken coop when he was 6 years old. His first flock was a bantam rooster and  5 hens. As the years went by we added other chicken coops, then we added a rabbit house and later two barns for our herd of dairy goats and their progeny. He raised chickens and sold eggs and supplied eggs to our table,  sold rabbits to 4-H members as show animals, and the dairy goats gave us an ample supply of goats milk for cheese and to drink.  The grounds around our house were developed to support his interests and we enjoyed the life that the animals brought to the homestead and the wholesome, beautiful food that came to the table.

The first small coop that 6 year old E.M and his dad built to house his prized bantam Rooster "Bad Boy" and his 5 hens. The bantam eggs make wonderful omelets!

E.M. planting flowers around the rabbit cage in his "Bunny Garden"  Circa 1996

 Our home schooling years, (17 years in total), occupied our attentions and land for many years. As the boys grew and developed new interests, we tried to make sure that they had a place and time to explore them. Now that the boys have grown to men and live in their own places, the homestead has been taking on a new face. We are now crafting our land to meet the needs and interests of an empty nest couple. Our interest has always been self sufficiency, organic sustainable agriculture, and preserving of "lost arts" like herbal medicine, food preservation, and "simple" living. Now that it is just the two of us, that is our focus. We are vegan, so we no longer need to have livestock or chickens, and as much as I loved having the animals around, I want to be free to travel for extended periods, so we no longer have barnyard animals. We have been streamlining our gardens, adding more beds to host my medicinal herbs and beds for permanent perennials like asparagus and ginger and edible perennials that we never had room for when we had growing boys, (and their friends), to feed. We have also been looking to the future with our efforts going to establishing a learning center/ nursery here at Heart's Ease Cottage. Teaching is my passion, and I want to make our years of experience and the techniques that we have developed available to others who are interested in self sufficiency and small scale homesteading. More on that in future blog posts, but for today I want to turn one of our most recent projects...

A year or so ago, a friend of ours gave us a 1890's vintage wood stove. He had kept it as a project for years, but never had the time to work on it, so he gave it to us. It spent a year in stasis in one of the chicken houses, protected from the weather, but still in need of a lot of TLC. Then last summer, my husband began to putter on it, brushing it with a wire brush and sand paper to eliminate the rust, (much of this was done without my knowledge, since he was trying to surprise me with the completed stove).

One piece of the unfinished stove

He sent several of the ornamental parts off to be nickel plated, and began to make plans for the interior brick chimney to be refaced. At this point he let me in on the surprise, since he knew I would want to choose the new interior look. We had the chimney repaired, the interior refaced and the stove sanded  and painted with stove black. When the decorative pieces arrived, (a saga in itself, where the plating company changed location and lost some of the key parts... which as of yet have not been found or replaced...sigh.), we were ready to put the stove in place and hook it up to the new chimney. So, after 22 years of waiting, Heart's Ease Cottage is once again equipped with a wood burning heat stove. The project is not finished, since we will be refurbishing the wood floor in that room during the warm weather months and installing a ceramic tile base for the stove to stand on. For now the stove is sitting on a fireproof pad awaiting the completion of that room. But in the meantime are able to use the stove and enjoy its warmth for heat and ambiance.It has been a long time in coming, but it is so worth the wait! Many thanks and big hugs to my husband for knowing the desires of my heart and working so hard to bring them to life!

The old Franklin stove and the 1944 brick chimney which was damaged by the hurricane.  Circa 1989


A day time view of the new stone and newly refinished 1890's stove.

 I am so excited about having a working stove in that room again, and it sure is pretty set against the lighter stone we chose for the chimney face!  Circa 2013

So while the cool weather lasts, we are drinking hot tea and playing cards or backgammon near the fire and enjoying the fruits of our labors. Until next time! I hope you are loving life and living your dreams!

Blog Hops this post is linked to:
Busy Bee's Blog Hop #12 
Country Homemaker Hop#60

02 April 2013

How to Make an Herbal Tincture Part 2

It is a beautiful day today, The skies are clear for a change and the weather is warm, only the breeze is chilly. It hardly seems necessary to worry about fending off illness when it seems that spring is here and hopefully "cold and flu season" is over. But with spring comes allergy problems and the secondary infections that may follow, so we aren't out of the woods yet, it is wise to have your infection fighting medicinal herb tinctures ready at hand.

 In my last post on the subject, How To Make an Herbal Tincture Part 1, I explained how to begin the tincture process. In this post I will show you what to do after the 6 weeks of tincturing is accomplished. During the last six weeks the herbs have been sitting in 190 proof grain alcohol, in a dark place, while the grain alcohol works as a solvent to extract herbal essence from the plant matter. Now the extraction process is complete and the tincture is ready to be poured off and diluted for use.

Items that you will need to bottle up your tinctures:


Finished tinctures
Glass bowl 
Measuring cup or container with pouring spout
Small measuring glass like a shot glass with liquid measure marks on it, (Walmart)
Strainer
Cheese cloth
One 2 oz. amber bottles with dropper lid per tincture being made. (Mountain Rose Herbs sells them for $1.50 ea. or you can use a recycled  dark glass bottle like a vanilla bottle, but you will want some sort of dropper for dispensing the tincture).
Small glass funnel that will fit in bottle or a squeeze bottle with nozzle, (Michael's may have them in the cake decorating section, I also found a set of 6 at Sam's for about $4)
Sticky backed labels or paper labels and clear packing tape


Put the strainer in a medium sized bowl and line with cheese cloth. Pour the contents of the tincture jar into the strainer and let sit for a few minutes.

Gather up the edges of the cheese cloth, hold them together, with the other hand twist the cheesecloth holding the herbs until contents are tightly drawn up. Squeeze the cheese cloth "bag" to remove any remaining tincture, until it stops dripping tincture. Some herbs are soft and this will be easy to do, other herbs are woody and squeezing the bag will not produce much liquid, if the herbs are woody, just give it a squeeze for good measure and move on to next step. Dispose of the plant material, there is nothing of value left in in it at this point.

For a 2 ounce bottle, pour 1 ounce of tincture in a small liquid ounce measuring glass pour it into your small measuring cup. 

Then fill the measuring glass with one ounce of purified or distilled water and add to ticnture in the measuring cup. This makes a working solution. Stir to mix.

Place small funnel in the 2 oz. bottle and fill the bottle. If you measured carefully, there should still be room for the dropper to fit in the bottle without overflowing. If you want to make sure not to force tincture out when initially fitting the dropper in the bottle, stick the tip of the dropper in the bottle and draw up some of the liquid into the dropper, then let the dropper down into the bottle and screw the top on firmly.

At this point you should label your dropper bottle with the contents and the fact that it is a dilution or "working solution", as well as the dosage to be taken and any warnings that need to be read before using. The rest of the tincture should be kept in the concentrated form, in a jar with a close fitting lid. If possible, store in a dark glass jar, but if that is not available then use a canning jar or other glass jar, label well with the contents and dilution instructions and store in a cool dark place. The tincture concentrate will last a long time (years), if stored properly. The diluted tincture will last a year or longer. I label my bottles and then cover the label completely with clear packing tape, so that any dribbles will not run the info on the label. I reuse my bottle over and over, I just wash them thoroughly and remove the label before reusing.

I hope that you will give making your own herbal tinctures a try. It is simple to do and the tictures will be very helpful in keeping you and your family well!

**In the near future I will be offering tincture kits, which will include everything you need to make your own home made herbal tinctures. As well as other equipment and tools that I have found useful in making my own remedies and cosmetics. I will make an announcement when I have the kits available. If you are interested and would like to have a list of things I will be offering, just leave a comment and an e-mail addy and I will send you a list which will include pricing.** 

Blog Hops this post is linked to:
Frugal Days, Sustainable Ways#67
Wildcrafting Wednesday #14
Home Acre Blog Hop #13
Farm Girl Friday Blog Hop #103
Busy Bee's Blog Hop #11
Farm Girl Blog Fest #28
Strangers and Pilgrims on Earth herbal-link-up-for-bath-body-care-

25 March 2013

Extending the Growing Season


We have a 240 day growing season here in the Piedmont of North Carolina, but because I know my climate and am prepared for its whims, I can garden 365 days a year. Of course, I am not picking tomatoes in December, but the garden beds are full of greens, cabbages, root crops and crops that have very long seasons like leeks and garlic, and we are eating out of the garden every day all winter long. We do this through plant selection, ground preparation and on demand shelter.

 In order to grow some of the more tender cool weather crops, or to give newly planted starts a little shelter while they get established, we devised a greenhouse tunnel system that we use on our raised beds as we see the need for them. We have similar systems at the ready during the sweltering days of summer, but since it is cold right now I will talk about our winter bag of tricks for extending the winter growing season. Our garden beds are French Intensive, deep dug, raised beds. The beds are never walked on and they are fed copious quantities of organic matter through mulching and applying compost. The beds are four feet wide and depending on their location, range between 15 to 25 feet in length. The green house tunnels can be set up in a matter of a half hour or so, any time we see the need and will fit any of the beds we have in use.
A simple and inexpensive way to extend the growing season.

The green house tunnels are simple to set up and the material costs are minimal, as long as we are careful to take care of the plastic from year to year. We use a 100 foot long by 10 wide roll of 6 ml. plastic for the tunnel covers. We cut the roll into 5, 20 foot lengths. We seldom need to cover more than 5 beds at a time since many of the things we grow in the winter aren't bothered by freezing weather, so five tunnels is plenty. We start with 1 1/4" PVC plumbing pipe 10 feet long and cut it into 2 foot lengths with a PVC pipe cutter, (which we happen to own since we did our own plumbing, a hack saw will cut the pipe without any trouble, if you don't have a pipe cutter.) Then we drill a hole in the pipe 1 inch from the end through both sides of the pipe slightly larger in diamater than a 16 penny nail., (this hole is useful later when we are wanting to get the pipes out of the ground...more on that later). For the hoops we use 1/2 inch PVC pipe which is sold in 10 foot lengths. We  cut the pipe to 8 foot for short tunnels and use 10 foot pipes for tall tunnels. The 1 1/4 inch pipes are driven onto the ground with the drilled hole end up, using a heavy rubber mallot, (if you don't have a mallot, then use short a piece of 2x4, rest the 4 inch side flat on top of the pipe and hit the 2x4 with a hammer. Don't hit the pipe with a hammer without something to soften the blow it will split the pipe). Drive them into the ground until 3-4 inches of pipe remain above the soil. The pipes should be set opposing each other across the 4 foot wide span of the bed and driven in the ground at 3 foot intervals on each side of the bed.
The 1 1/4" sleeve pipe with the 1/2" hoop set in place.

The 1 1/4" sleeve pipes are in place opposite each other in the bed and  3 feet apart along the length of the bed.


The next step is to determine whether a tunnel needs to be tall or short, tall for things like Fava Beans and peas. short for lettuce, and other greens.Then put the appropriate length pipe in one hole and gently bend the pipe and slide it into the 1 1/4 inch sleeve pipe on the opposite side of the bed. It is easier to do this with two people, one on each side of the bed. If only one person is available, then start in the middle of the length of the bed and work your way towards the ends. This way you are not trying to reach over a hoop that is already set as you work your way from one side of the bed to the other. It is helpful to have a plastic clothes hanger with you so that you can set one side of the pipe, walk around the bed, (never walk on the beds!!), and reach across the bed using the hanger to hook the pipe and pull it to yourself. Bend the pipe gently and slide it into the sleeve pipe. Try to set the pipes at an even height all along the bed by sliding them up or down slightly inside the sleeve pipe until they are a uniform height. At this point it is time to weed the beds, plant your seedlings and water well.
Romaine that was started inside under lights is now in its new home in the garden. They will be given some shelter from the cold while they get established.
 
 When the bed is planted pull the 6 mil. plastic sheeting across the hoops, making sure to have it centered on the hoops so that an equal length of plastic drapes over side to side and end to end. Anchor one side of the plastic to the ground by laying boards, rocks, or other heavy objects along the length of the tunnel, then repeat on the opposite side, being sure to take out any slack to avoid sags that could catch water. Then gather the plastic together on the ends and twist to pull up any slack. pin with a board or other heavy object.
Place the plastic over the hoops and draw up tight to prevent sagging that could catch water or snow and collapse the tunnel.

As long as the days stay around freezing the plants will be safe and warm under the plastic, if the day is above 45degrees, then the plastic should be pulled back on one side to allow air circulation. It can get very warm inside the tunnels if the days are much above freezing, and you don't want to cook your seedlings, so make sure to monitor the daytime temps inside the tunnel. The other end of that is not to forget to cover the tunnels before nightfall if the night time temps are below freezing. As long as the tunnels are in use both day and night to cover the plants you won't have to water very often, since it creates it's own weather inside.Water will condense on the plastic during the day when the sun warms the air inside the tunnel and then when the temps. begin to cool off the water will "rain" back down on the plants. I check periodically every other day or so by sticking a hand under the plastic and poking my finger in the soil to see if it is moist. If it feels dry then I will pull back the plastic enough to get the watering wand in and water end to end. I haven't had to do that very often though. If you are pulling the cover back during the day then you will need to check the soil to see if you need to water before you cover them for the night.


These greenhouse tunnels can extend your growing season so you can grow crops all during the winter. Even in coldest climates the tunnels should give enough protection to grow cabbages, kale, greens, chard, and root crops, where it is too cold for growing things like lettuce, even with some shelter. The tunnels can be used for many seasons as long as care is taken to properly clean and dry the plastic before storing for the summer. The poles will last for years if they are cleaned and stored properly.
An unexpected snow storm covered the winter garden in several inches of snow, which didn't bother our winter hardy crops like cabbage and kale, but without the tunnel, our more tender salad greens may have been ruined. Fortunately, they were snugly tucked in to their greenhouse tunnel, safe and sound.

The tunnel may be covered with snow and the outside temps below freezing, but inside the lettuces are are protected from the inclement weather and the air temp is above freezing.

By using greenhouse tunnels, I have salad greens, herbs, and other cool weather crops fresh out of my garden all winter long. I see substantial savings of my grocery dollars, since I am not buying produce during the most expensive time of the year. The tunnels pay for themselves the first season I use them and then my savings continue to grow with each season they are in use. But the best thing is that  I can pick colorful, nutritious and delicious produce throughout the winter, for very little money or effort.

**When ready to remove the 1 1/4" pipe from the ground slide a 16 penny nail through the drilled holes and pop it up out of the ground by using the nail as a leverage point for a shovel. To extend the life of your PVC pieces and plastic sheeting clean them and store in a dry place out of the sunlight.

Blog Hops that this post is linked to:
Clever Chicks Blog Hop #27
Farm Girl Blog Fest #25
Wildcrafting Wednesday #81 
The Busy Bee's 10th Thursday Blog Hop 
Farm Girl Blog Fest #26 
Farmgirl Friday Blog Hop #102
Related Posts Plugin for WordPress, Blogger...